Monday, July 16, 2012

New Acquisitions

Recently, as you may have read earlier, I was lucky enough to go on a nice 10 day vacation to Spain and France. The main reason being my cousin getting married in Bilbao, which was fantastic and beautiful; congratulations Katie! But the other reason I decided to go was the opportunity! I had never been to Europe before, and I knew that once I move out of my parents house I would have even less money, and therefore the chance of going again wouldn't be for a long time. I'm very glad I was able to go, but I'm also very happy to be back and share with you all some of the most important things I brought back from Europe: clothing! 

Now, I surprised myself and I actually didn't go CRAZY with shopping while I was over there. I mean, don't get me wrong, I could have dropped Euros like they were on fire but I paced myself, looked around, and only chose a few items out that I thought I would really love and wear often! In Bilbao, the first of my destinations, I picked up two amazing blouses and a pair of pants. It was wear I did the bulk of my clothing shopping (surprisingly!) The first blouse was from a small boutique store in San Sebastian, the other two pieces were from Zara; which, might I add, treated me very well. Most of my items came from Zara. Everything in there was mind-blowing! 


The next is my second favourite purchase. The only sad part is, here in Canada it is too stinking hot to wear it. Yet.

But wait, this is the best part: 
The studs!! I loved the floral on this to begin with but when I saw the studs I flipped out. Then finally, a pair of floral pants! Ever since the pattern mixing post, I have been searching high and low...finally, I can say I have a pair! 


The last item I wanted to show you guys was my 'splurge' item, but at 60 euro it really wasn't AWFUL. I could've done a lot worse, let's put it that way. This I bought in Paris on the Champs-Élysées at (you guessed it) Zara! Now let me explain something...I don't have a leather jacket, or even faux leather jacket, and those are pretty great to have in a wardrobe. But the other thing you should know about me is I am a gold person; meaning in a battle of gold and silver, I will support gold and battle to the death for it (me and my army of 70+ grandmothers). I know we're a generation of silver or platinum, but I love gooooooooold! So when I saw this I needed it. 


Again, the only negative to this beauty is it will have to stay in my closet until Canada decides that 30+ temperatures are severely uncool (ha-ha). 

So in the posts to come, expect to see these pieces featured from time to time. It's very rare for me to say but buying some of these makes me wish summer was almost over. And then I remember all the other wonderful stuff that comes with summer, put on my patience sun-hat and move on with my day!

- Rebekah Eden.
The Velvet Team


Wednesday, July 11, 2012

Outfit Post: Poetic License

Last night I lived the dream, that is,
to escape the suburbs and walk among the poets and the artists.
The grip of black rubber on tired highway asphalt carried me farthest
from the suburbs where I'm always sleeping, to a downtown, a little theatre
I paid the man, and the parking metre,
to see what I might discover there, beyond the picket fence, hoping for something sweeter.

Sure I'm waxing dramatically, but isn't that what poetry slams are all about? For those of you who don't know: a poetry slam is a competition where writers perform their written pieces before an audience. Five random judges are selected to score the poem and the performance out of ten. Often there are multiple rounds,  and at the end, the last poet standing gets the prize. (Usually repute or money or both.) This is exactly what I went to see two nights ago.

I've been to a handful of them and every time I go, I always leave wanting more. The poetry community is tight knit, laid back and psychotically talented. It's intimidating to watch these people shine, but it's also inspiring. I never depart from a slam without the urge to write, and also awe and respect for the power of human expression and condition. The absolute best way to experience is a slam is to find the movement in your local town and to check it out. When all else, fails, we have the internet.

Not only was last night a youth slam, where young people brought up their work to compete and perform, but there was also a headliner. A famed Canadian poet by the name of Shane Koyczan, known to most people as 'that poet guy at the Vancouver winter Olympics a couple years back.' He and his band, The Long Story Short are touring, and I was lucky to catch them live. If you want a taste of it (and trust me, you do) check out the video below:
 
100% certified Bangarang. I had the pleasure to see this man up close and personal. He made me laugh, he made me cry, and he made me ache to put pen to paper, or at least fingers to keyboard. If you ever have the chance to see Shane live in action, do it. A thousand times over, do it. I can't emphasize this anymore butIcantry DO IT. 

One of the things I get weird about at slams is what to wear to them. I know it's 100% over thinking it, but I get self conscious around people I think are awesome... I happen to think poets are awesome.  Do you want to project artsy, charming, pretentious, badass, or all of the above? What it really comes down to, in the end, I wear whatever I feel like. This time, I went low key, capping it off with a beret. Why? BECAUSE I CAN. (I heart beatniks.) The biggest part of wearing something you're paranoid about is attitude. Rock it anyway... and if you're still insecure when out and about, you can always claim it's ironic.

Shane totally complimented my belt too. He said it's a finishing flag or a checkerboard or something. Wink! That and he called me a lovely lady. Life made.
  Combat Boots: Aldo Skinny Jeans: BDG Vest: H&M Tank: Forever 21 Beret: Gift from a friend.

What items have you claimed in the name of irony?
-Riley
The Velvet Team

Monday, July 09, 2012

Toronto Pride 2012

Two weekends past was nothing short of fantastic. Riley and I have been attending Toronto Pride for three years in a row now, and every year it just keeps getting better! This year we stayed for three days celebrating and experiencing the excitement and fun of Church Street and everything it had to offer, including vendors, music, people, food and, of course, PRIDE!

Attending the Pride festivities has become an important tradition for us. We both love to show our support for the LGBT rights movement as much as we can and really, showing support is never as much fun as this!

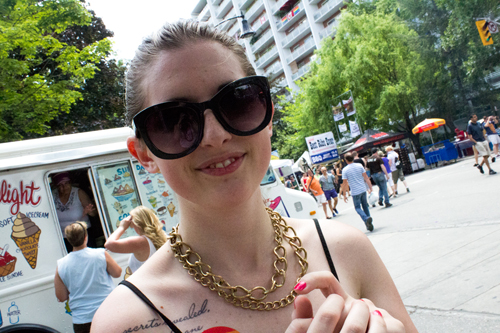
Although we were able to stay in Toronto for the weekend, we were kept very busy by the activities happening around the village so we didn't get many pictures of our outfits specifically. But on Saturday, surprisingly during our busiest day of all, we were able to snap a few pictures of each other's outfits. Saturday was just like the rest of the weekend: stinking hot out. Both of us knew the best clothing to wear for a day like that was as little clothing as possible. I walked around in my black romper, while Riley showed off a more LGBT appropriate 'Fashion Against AIDs' tee.


Of course, the streets were full of people dressed in ridiculous, fabulous, barely-there outfits, but there were a few pictures we were able to snap up. Including the gentlemen below who just wore their wash-board abs (yummy), a lady repping a rainbow corset, our good friend Alli showing off her amazing Adidas, and a man strutting in the most awe-inspiring fascinator we have ever seen -- we won't be attempting to make that any time soon!

I'd also like to take the conversation away from fashion for just a moment to mention that Riley, an avid runner, ran in the Toronto Pride 5k race and did absolutely fantastic! She was able to beat her previous time by more than 30 seconds; what's even more, she got under the 30 minute mark, which is not only astounding but also a personal goal for her! She was able to raise $253 to help aid in LGBT efforts and run her best race yet! Congratulations, Riley, and thank you for your hard work in helping the LGBT community!

After this year, I'm already looking forward to next year (someone start a countdown!) Although this one will be hard to beat, I'm sure every year will only get better and better!

Another update: On Monday I actually left for Spain so the updates on the blog may be a little slow for the next few days, but I assure you I'll update with pictures of outfits and other fun things as much as I can while I'm here! Next week, we assure you we'll return to our regular programming! Bangarang!

- Rebekah Eden
The Velvet Team

Thursday, July 05, 2012

Theme: Bangarang!


This theme post was delayed, due to Pride festivities. We promise we're be back in action ASAP!


Bangarang

1. Battle cry of the Lost Boys in the movie Hook.
2. Jamaican slang defined as a hubbub, uproar, disorder, or disturbance.
3. General exclamation meant to signify approval or amazement.
              -Urban Dictionary
 
There are things that are so awesome in the world that they can't be described with just some everyday word. Some commonplace word just doesn't cut the mustard to sum them up. Summer falls into this category. Honestly, think about all the things that come with the heating up of the weather as we tally forth into the months of July and August.

Open air music festivals. Camping out underneath the stars. Skinny dipping. Dancing late into the night. Catching rays on the beach, curling your toes into the sand. Sipping your favourite cold drink. Running until you break a sweat. Doing nothing until you break a sweat. Ice cream cones. Fireflies. Ghost stories. Wild beach hair. Bonfires. Brightly coloured feathers, accessories and clothing. The taste of fresh fruit. The smell of coconut sunscreen. Your new favourite bathing suit. Jumping off the cliff into the lake below. Cheers-ing to life over drinks on the patio. Running wild, anytime, anywhere you want. Neon war paint. Summer romance. Picnics. Fireworks. New top 40 bar hits to get stuck in your head, which is awesome until the radio overplays-them-like-woah. Wearing cute sandals to show off your favourite colour of nail polish. The freckles the sun brings out on your skin. The breeze of the leaves in the trees. Larger than life thunderstorms.

This month is about all of the above and anything else that is beyond and the regular stellar that summer has to bring you. We're here to shout it from the rooftops: July is the month of all things Bangarang! If it's wild, outrageous, elaborate or primitive, it's going to be here.

Also, contrary to current pop culture this theme has nothing to do with Skrillex... Although if you want a quirky Bangarang remix to groove to (dubstep free, we promise), we have a suggestion:

Welcome to summer!
- The Velvet Team

Thursday, June 28, 2012

DIY: Fascinators!

Finding an idea for this month's DIY left us both scratching our head for a few weeks. Then Riley brilliantly brought up the option of doing home-made fascinators! They're relatively easy to make, cheap (depending how big or bold you want it), and they fit perfectly into our monthly theme of The Show Must Go On. Plus, since it's high season for weddings, it could be a good way to accessorize if you happen to be heading out to a lot of ceremonies this summer.

While you could easily buy these from an accessory store, (they're in style, thank you Kate Middleton), making a fascinator piece as a DIY is awesome because it can be exactly how you want it for about the same price. The ones we made turned out completely different from one another! So this tutorial will highlight a few basic steps to make sure you get something beautiful and lasting, but the rest is up to your taste and creativity. 

So, forget the mall, hit your local craft store, and let's get fascinating!

Budget: $20.00 per person

Difficulty: 4 out of 10
Who else is rocking it:
Kate Middleton, Lady Gaga

Step 1: Get the supplies!

A few things to remember before you go shopping. You'll want to have some sort of idea in mind, whether it be a particular item (like veil tulle or a flower) or even just a colour scheme!
We only say this because craft stores are GINORMOUS. Without some sort of idea, you could literally waste an afternoon wandering around the labyrinth of buttons and glitter (awesome) finding all the possibilities and zero David Bowie (not as awesome). You'll also want to decide if you want a clip, headband or a hair comb, which can limit or change what you do with your piece. 

Our four basic must-haves for this DIY are:
• your base (headband, clip, comb, as mentioned before)
• thick felt or fabric
• a glue gun
• a sewing machine or a needle and thread. 

These are the things that almost every fascinator will need. The rest of the items are the fun stuff. Feathers, flowers, jewels, ribbons, pendants... What you buy is completely up to you and your imagination!

Note: We bought a LOT of stuff, all pictured here. But we didn't end up using some of it, so save the receipt! If anything is left un-opened and you don't plan on using it, return it and save some dough!

Step 2: Make Your Felt/Fabric Base

No matter which kind of base you choose, this step is crucial. These little pieces of felt or fabric will make sure your fascinator is super secure and will last you more than just one or two wears. They're the big, secure area that is glue and stitch-friendly to put all your fascinating things on! Pretty important, no? Well don't worry, they're so easy to make, too! 

We took a thick cotton fabric (felt is probably an even better option) and layered it up so it was a thick, pillow-like oval. Then all you do is stitch (by hand or with a sewing machine) all those layers together, to a sturdy result.

They don't have to be pretty, as they'll be covered up in not time.
Note: Remember to make these ovals in relative size to the item you're making your fascinator on.

Step 3: Play with the Items!

Before or after you start to plan out how you want your piece laid out, make sure that anything customizing to pieces is done first. For instance, on Rebekah's fascinator she wanted to put a button in the middle of her flower.
Another example is if you want a veil, play with the tulle and cut or stitch it together the way you want it, or pre dye any fabric ribbons to the colour you want if you're feeling ambitious. 

It's much easier to complete all these little steps beforehand, because if you don't want to get it exactly right, you can still take it apart and try again. 

Step 4: Your Plan of Attack!

You want to try combinations until you hit the one that looks best. Riley's is a prime example of this. She wasn't sure of the look she was going for, not wanting it TOO outrageous for everyday wear, but obviously a piece of this calibre required pizzazz! She took her time and really laid it out exactly how she wanted.  

On the other hand, Rebekah had a solid vision of her finished product so this step went quickly. It's better to take your time if you don't know what you want, because once you start attaching, it's much harder to switch your idea up!

Step 5: Begin Attaching

Once you have your fascinator laid out how you like it, begin putting things together one layer at a time! Rebekah wanted some tulle just at the base so she began by stitching it on...


Then she hot glued the feathers on just how she wanted them. As with the previous step, take your time. Even if you know how you want things, if you aren't careful, you could make a mistake (or stick yourself with hot glue, also fun). Of course it's always fixable, but if you pace yourself, you have a better chance of pulling it off without a hitch!

These steps are completely dependent on what items you chose way back in step 1. The best two pieces advice we can give is to: 1) Do it in layers and 2) Make sure everything is secure before you continue. Glue is probably the best way to put everything together, but if you can also put a few stitches in for extra security, do it!

Step 6: Attaching the Fascinator Piece to Your Base

After the layering, the planning and the burning ourselves with hot glue was finished, our fascinator pieces were complete. All we had to figure out a good way to attach them. First of all, make sure if you're making a headband, the placement ON the headband is what you want! This could take some work in the mirror, but it's much easier if someone, say your partner in blogging and crime, helps you by marking the headband (under the fabric of course).

Once you get it where you want it, glue it down on whatever base you chose. For those of you who didn't choose a headband, your fascinator should be finished! (Congrats, you look fabulous!) But headbanders, you've got an extra step! This is especially important if, like Rebekah, you chose a thinner headband. Because the fabric was much wider than the headband, she cut a rectangle and both glued and stitched it over the bottom side of the base, attaching it to the headband with extra reinforcement. This ensured her fascinator would stay put!

Here are our finished products!

Riley's beautiful Autumn-coloured piece with a pretty poppy!


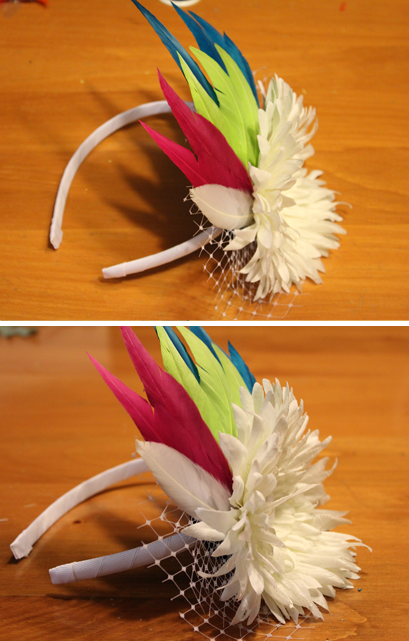
Rebekah's crazy-coloured flower and feather piece!


Making these were a lot easier than what we thought they would be and really a lot of fun. Fascinators can be challenging to wear in everyday life, so if you do DIY one yourself, we would love to see pics of the awesome results!

Don't be shy about it either! These are kind of like a statement necklace, and really can pump up a simple outfit to make you stand out as a super classy fashionista! Really, it's just fascinating stuff!

- Riley & Rebekah Eden
The Velvet Team