
While you could easily buy these from an accessory store, (they're in style, thank you Kate Middleton), making a fascinator piece as a DIY is awesome because it can be exactly how you want it for about the same price. The ones we made turned out completely different from one another! So this tutorial will highlight a few basic steps to make sure you get something beautiful and lasting, but the rest is up to your taste and creativity.
So, forget the mall, hit your local craft store, and let's get fascinating!
Budget: $20.00 per person
Difficulty: 4 out of 10
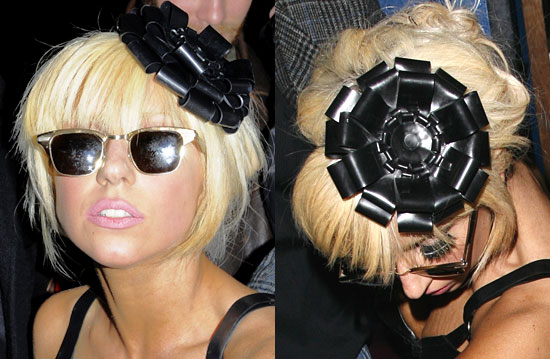
Who else is rocking it: Kate Middleton, Lady Gaga
So, forget the mall, hit your local craft store, and let's get fascinating!
Budget: $20.00 per person
Difficulty: 4 out of 10
Who else is rocking it: Kate Middleton, Lady Gaga
Step 1: Get the supplies!

A few things to remember before you go shopping. You'll want to have some sort of idea in mind, whether it be a particular item (like veil tulle or a flower) or even just a colour scheme!
We only say this because craft stores are GINORMOUS. Without some sort of idea, you could literally waste an afternoon wandering around the labyrinth of buttons and glitter (awesome) finding all the possibilities and zero David Bowie (not as awesome). You'll also want to decide if you want a clip, headband or a hair comb, which can limit or change what you do with your piece.
We only say this because craft stores are GINORMOUS. Without some sort of idea, you could literally waste an afternoon wandering around the labyrinth of buttons and glitter (awesome) finding all the possibilities and zero David Bowie (not as awesome). You'll also want to decide if you want a clip, headband or a hair comb, which can limit or change what you do with your piece.
Our four basic must-haves for this DIY are:
• your base (headband, clip, comb, as mentioned before)
• your base (headband, clip, comb, as mentioned before)
• thick felt or fabric
• a glue gun
• a sewing machine or a needle and thread.
These are the things that almost every fascinator will need. The rest of the items are the fun stuff. Feathers, flowers, jewels, ribbons, pendants... What you buy is completely up to you and your imagination!
Note: We bought a LOT of stuff, all pictured here. But we didn't end up using some of it, so save the receipt! If anything is left un-opened and you don't plan on using it, return it and save some dough!
Step 2: Make Your Felt/Fabric Base

No matter which kind of base you choose, this step is crucial. These little pieces of felt or fabric will make sure your fascinator is super secure and will last you more than just one or two wears. They're the big, secure area that is glue and stitch-friendly to put all your fascinating things on! Pretty important, no? Well don't worry, they're so easy to make, too!
We took a thick cotton fabric (felt is probably an even better option) and layered it up so it was a thick, pillow-like oval. Then all you do is stitch (by hand or with a sewing machine) all those layers together, to a sturdy result.
They don't have to be pretty, as they'll be covered up in not time.
Note: Remember to make these ovals in relative size to the item you're making your fascinator on.
Note: Remember to make these ovals in relative size to the item you're making your fascinator on.
Step 3: Play with the Items!

Before or after you start to plan out how you want your piece laid out, make sure that anything customizing to pieces is done first. For instance, on Rebekah's fascinator she wanted to put a button in the middle of her flower.
Another example is if you want a veil, play with the tulle and cut or stitch it together the way you want it, or pre dye any fabric ribbons to the colour you want if you're feeling ambitious.
It's much easier to complete all these little steps beforehand, because if you don't want to get it exactly right, you can still take it apart and try again.
Step 4: Your Plan of Attack!

You want to try combinations until you hit the one that looks best. Riley's is a prime example of this. She wasn't sure of the look she was going for, not wanting it TOO outrageous for everyday wear, but obviously a piece of this calibre required pizzazz! She took her time and really laid it out exactly how she wanted.
On the other hand, Rebekah had a solid vision of her finished product so this step went quickly. It's better to take your time if you don't know what you want, because once you start attaching, it's much harder to switch your idea up!
Step 5: Begin Attaching

Once you have your fascinator laid out how you like it, begin putting things together one layer at a time! Rebekah wanted some tulle just at the base so she began by stitching it on...

Then she hot glued the feathers on just how she wanted them. As with the previous step, take your time. Even if you know how you want things, if you aren't careful, you could make a mistake (or stick yourself with hot glue, also fun). Of course it's always fixable, but if you pace yourself, you have a better chance of pulling it off without a hitch!
These steps are completely dependent on what items you chose way back in step 1. The best two pieces advice we can give is to: 1) Do it in layers and 2) Make sure everything is secure before you continue. Glue is probably the best way to put everything together, but if you can also put a few stitches in for extra security, do it!
Step 6: Attaching the Fascinator Piece to Your Base

After the layering, the planning and the burning ourselves with hot glue was finished, our fascinator pieces were complete. All we had to figure out a good way to attach them. First of all, make sure if you're making a headband, the placement ON the headband is what you want! This could take some work in the mirror, but it's much easier if someone, say your partner in blogging and crime, helps you by marking the headband (under the fabric of course).
Once you get it where you want it, glue it down on whatever base you chose. For those of you who didn't choose a headband, your fascinator should be finished! (Congrats, you look fabulous!) But headbanders, you've got an extra step! This is especially important if, like Rebekah, you chose a thinner headband. Because the fabric was much wider than the headband, she cut a rectangle and both glued and stitched it over the bottom side of the base, attaching it to the headband with extra reinforcement. This ensured her fascinator would stay put!
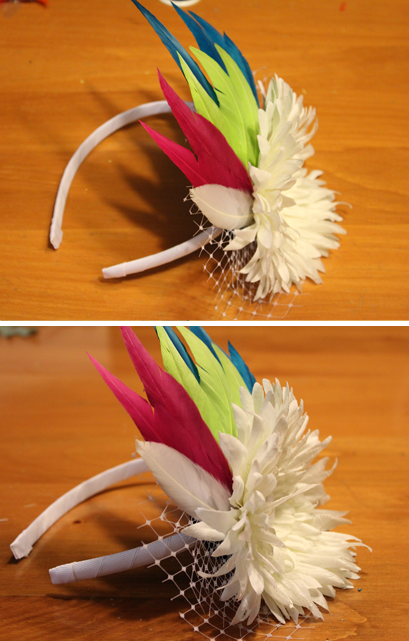
Here are our finished products!
Riley's beautiful Autumn-coloured piece with a pretty poppy!


Rebekah's crazy-coloured flower and feather piece!

Making these were a lot easier than what we thought they would be and really a lot of fun. Fascinators can be challenging to wear in everyday life, so if you do DIY one yourself, we would love to see pics of the awesome results!
Don't be shy about it either! These are kind of like a statement necklace, and really can pump up a simple outfit to make you stand out as a super classy fashionista! Really, it's just fascinating stuff!
- Riley & Rebekah Eden
The Velvet Team
No comments:
Post a Comment